 Table of Content
WordPress errors are a frustrating yet inevitable part of the WordPress experience. If your site is growing older, there will be chances that it will face a mistake sooner or later.
Because trouble might be around the corner, it’s better to be prepared for any eventuality. It means having an understanding of the errors prevalent in WordPress.
This post is intended for WordPress users looking to learn more about ten of the most common WordPress errors that exist.
After reading this, you will have a better understanding on what to do when one of these errors hit you on WordPress.
Note: Before we begin this article, make sure you have a working backup of your website at the ready. Besides being a best practice, it’s also useful when troubleshooting errors. You can either create a manual backup or use a WordPress plugin.
1. WordPress White Screen of Death
The most common WordPress error, the White Screen of Death, does precisely as its name suggests. All you get is a white screen display and nothing else: no recommendations or extra information at all.
A primary symptom is this error is due to reduced PHP memory limits. In addition to these, you also have issues with the hosting server. Based on that, you could either face an error on a single page or multiple pages.
Fixing the White Screen of Death Error on WordPress
The first solution that fixes this error is relatively simple. All you have to do is contact your hosting provider and translate your issue. If you have chosen the right service, then chances are, you will find a solution to the problem. You should only do this one if you have multiple sites on the same server giving an identical error.
If everything is okay with the server-side, it's time you look at your WordPress plugins and themes to see if they're the ones responsible. If you can access your wp-admin, try to disable your WordPress plugins from there. However, if you can't access it, you can deactivate it from the back-end.
Here’s how.
Using a File Transfer Protocol (FTP) like FileZilla, connect to your WordPress website. When you’ve accessed your WordPress files, you only have to look at the wp-content folder.
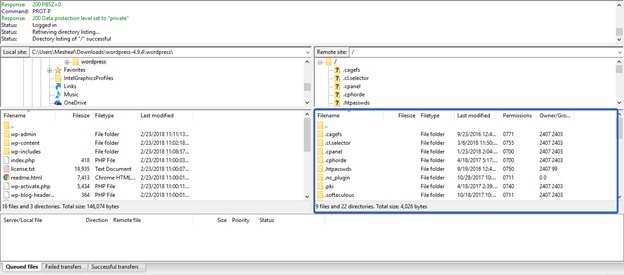
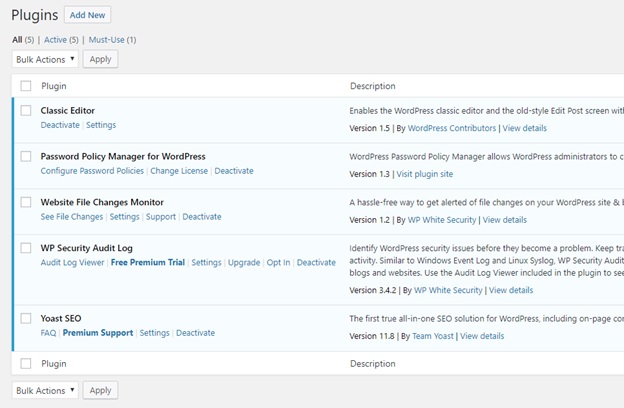
When you’ve located it, enter the folder and look for a folder titled Plugins, and rename it to plugins.old. Now, log-in to your WordPress admin dashboard, and from there, visit the Plugins section. Over there, all the plugins will be deactivated.
Activate them one by one and refresh your site. If you activate a plugin and the white screen shows up again, that’s the culprit. Repeat the renaming process once again, and delete the plugin that caused the issue.
2. WordPress Memory Exhausted
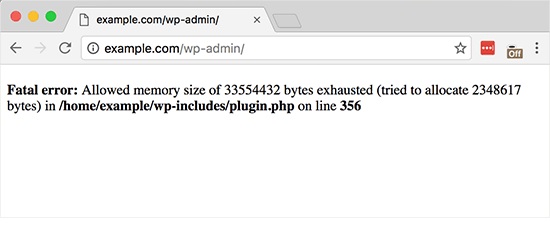
Another popular WordPress error, the memory exhaustion error is easy to solve though it does look threatening from the outset. Similar to the white screen error, memory limit reduction is the primary culprit behind this error.
Essentially, it gives out the following error;
Fatal Error: Allowed memory size of 33554432 bytes exhausted (tried to allocate 2348617 bytes) in /home/username/public_html/site1/wp-includes/plugin.php on line xxx
Fixing the WordPress Memory Exhausted Error
To fix this issue, you have to increase the memory limit of your WordPress site.
Again, you have to visit the back-end of your website through the FTP. When you've gained access, you have to find the wp-config.php file. When you've seen it, download it on your PC.
Open up the downloaded file on a code-editor like Notepad++ or Sublime Text. Just open it up and search for a term called “That's all, stop editing!”. Just above it, copy/paste the following code:
define( 'WP_MEMORY_LIMIT', '256M' );
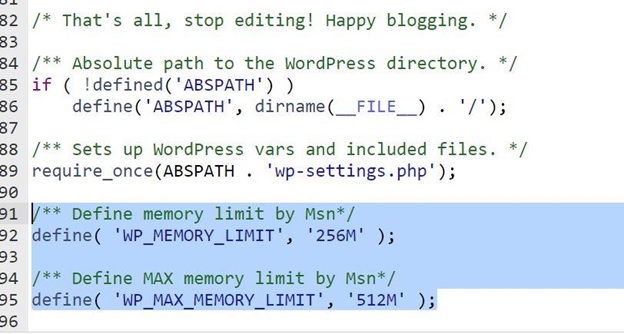
The code instructs the program to increase the memory limit to 256MB. Save your changes, and then re-upload the file.
3. WordPress Connection Timed Out
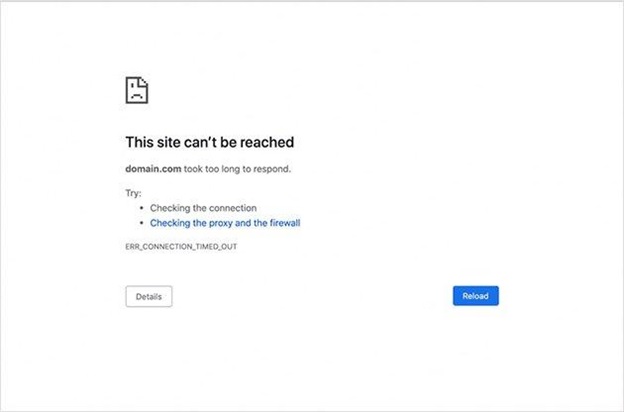
This WordPress error is primarily attributed to your hosting service's issues when the server is taking up too many resources. First off, it displays a "Site Can't Be Reached" message, and just below the Reload button, it shows the following error message:
ERROR_CONNECTION_TIMED_OUT
Fixing the Connection Timed out Error in WordPress
Fixing this error would, again, have you visiting the back-end of your website through the FTP. When you've accessed the back-end, you would have to deactivate your WordPress plugins and themes, as mentioned in the first error we discussed in this post.
This is the easiest fix to this issue.
If you're still facing the error, then it's best to increase the PHP memory limit, which, again, we discussed in the previous section. Lastly, if that doesn't help solve the issue, you should contact your hosting provider.
4. Error Establishing a Database Connection in WordPress
This error occurs when your WordPress site isn't able to establish a connection with your back-end database.
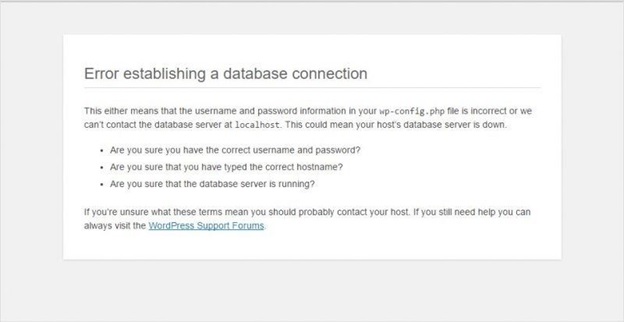
It's a unique error since it originates from the database as opposed to the back-end. Let's look at how you can solve it.
Fixing the Error Establishing a Database Connection in WordPress
So first off, you need to confirm whether you’re getting the same message displayed on the front-end as well as the back-end.
If you’re getting a different error on both ends, you need to fix your WordPress data-tables. Here’s how to do it.
Access your FTP, find the wp-config.php file and download it. Next, open the file in a code-editor like Sublime-Text or Notepad++ and locate a comment that says, "That's all, stop editing!".
Just above the comment statement, copy/paste the following code:
define('WP_ALLOW_REPAIR', true);
Save the changes in the file and upload it back to the server.
Once you’ve done that, visit your WordPress site’s maintenance and repair section by typing in this link:
https://www.yoursite.com/wp-admin/maint/repair.php
In place of your website, all you have to do is upload is type in your site name. When you're finished, click on the "Repair Database" button, and you're done.
In place of “yoursite," you type in your site. When you're there, all you have to do is click on "Repair Database," and you're done.
5. WordPress Internal Server Error

WordPress's internal server error is akin to the WordPress White Screen of Death error since it only displays a general and relatively vague mistake. The image above is the perfect illustration of this error.
Fixing the Internal Server Error in WordPress
The leading cause of this error is due to corruption within the .htaccess file. That being said, it’s relatively easy to solve it.
You can find the .htaccess file from the back-end when you access the wp-content folder within your WordPress directory. When you've found the file, all you have to do is rename it.
Now, refresh your browser to see whether the change has been made.
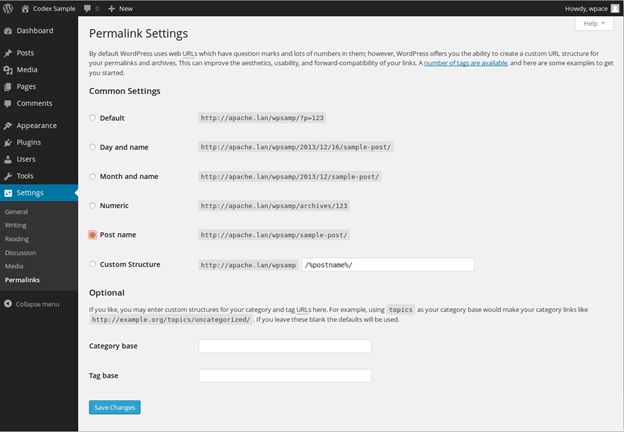
If you can now access your wp-admin dashboard, you need to visit the Settings > Permalinks area, and there scroll to the bottom and click on Save.
If it doesn’t, then access your WordPress dashboard and navigate to Settings > Permalinks.
The Save button creates a new file, and that's it. The last thing you need to do is go to your FTP again and delete the old, renamed .htaccess file.
6. WordPress Stuck in Maintenance Mode
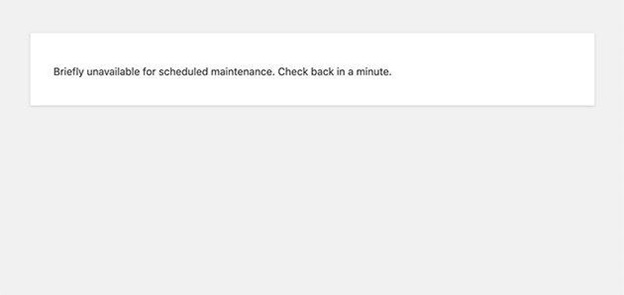
This error occurs when you're trying to make too many or too bulky changes to your WordPress website. Usually, when you're trying to make changes, WordPress gets on maintenance mode and exits it when the changes are done. But at certain moments, it gets stuck in maintenance mode.
While fixing this error is comfortable, we would recommend you to avoid updating too many plugins and themes at once generally.
How to Solve WordPress Stuck in Maintenance Mode
To fix this error on WordPress, you need to delete the .maintenance file from the back-end.
You can do that by either entering the File Manager option displayed on the cPanel of your website or through the FTP.
The .maintenance file is usually hidden inside both the options listed above. On FTP and the cPanel, you can find opportunities to display hidden files. Once you've found the .maintenance file, delete it and refresh to see if the error displayed has gone away.
7. WordPress Parse or Syntax Error
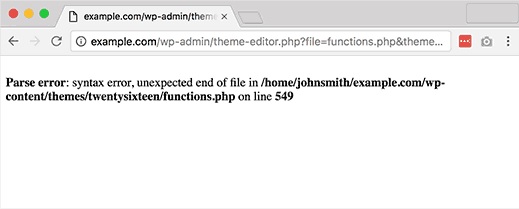
The Parse and Syntax error occurs primarily due to improper code snippets being inserted into the main WordPress file.
When you enter the wrong code snippets into WordPress for one reason or another, WordPress fails to read it and gives out the Parse and Syntax error.
Fixing the WordPress Parse or Syntax Error
The most important thing you need to overcome this error is to learn about major PHP code practices. Having that knowledge can help you avoid errors when adding new snippets of code in the future.
To fix this error, you need to locate the file in which you added the code-snippet. For that, you need to access your FTP and see where the error originated from.
Next up, you need to find the file in which you edited the code. Once you’ve located the file, all you have to do is edit and rewrite it with the correct syntax. Once you’ve done that, you’re good to go.
If you're a beginner, then it's best to have a WordPress developer present with you.
8. WordPress 404 Error
WordPress Error 404 is a very common error that you can encounter. The reason behind this is due to the poor configuration of permalinks. The second reason behind this is accidentally deleting the .htaccess file.
How to Resolve the WordPress 404 Error
To solve this error, you need to, first up, fix your permalinks settings.
Visit your permalinks section by going to Settings > Permalinks from your WordPress admin dashboard. When you're there, all you have to do is click on the Save Changes button. It creates a new .htaccess file that fixes your permalinks.
9. WordPress not Uploading images
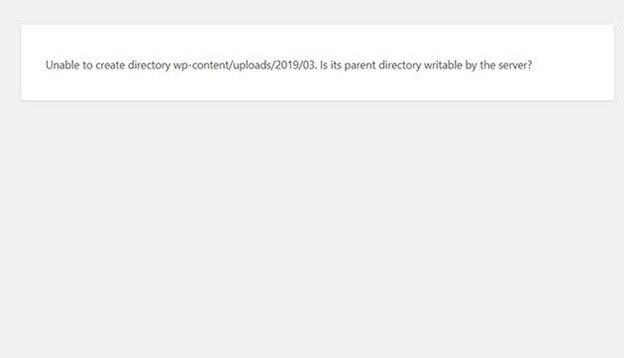
Sometimes, you'll get an error in uploading images on WordPress. If you face such an error, then don't worry; this error is prevalent and easy to fix.
Essentially, it displayed the following error:
‘Unable to create directory wp-content/uploads/2019/04. Is its parent directory writable by the server?’
Another sign this error is occurring is you don’t see images being uploaded in your media library.

How to fix Image Upload Issues in WordPress
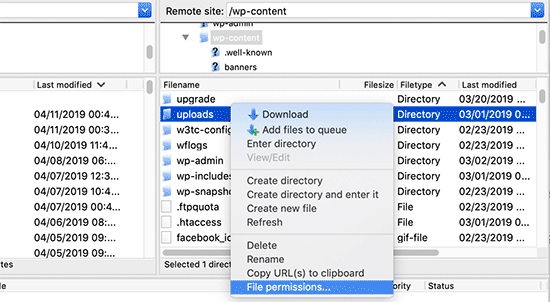
To fix this issue, you have to access your site through the FTP. Once you're connected, you need to visit the wp-content folder once again.
Within the folder, there is a sub-folder titled Uploads. This where all your media files are being stored.
Now, you need to set file permissions. For that, you need to right-click the uploads folder and, from there, select File Permissions.
When you’ve entered the File Permissions section, you need to set the following parameters.
- Numeric Value: 744
- Checkbox: Recurse into subdirectories
- Checkbox: Apply to directories only
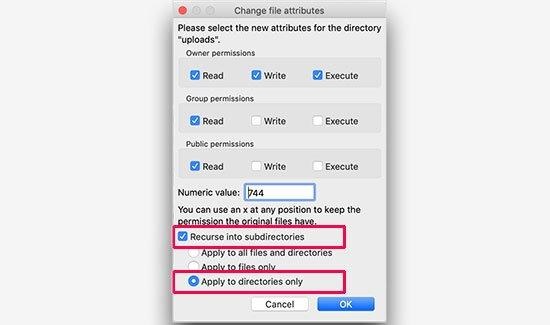
Once you’ve done this, the issue should be resolved.
10. “Are you Sure you Want to Do This” WordPress Issue
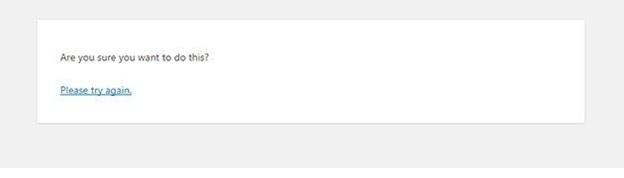
Another major WordPress error is the "are you sure you want to do this?" message. This error doesn't give out a "Yes" or a "No" to the answer. Instead, what you get is a "Please try again" link that leads you into a repetitive loop.
This error occurs due to your plugin and themes’ inability to use “Nonce” correctly. The term Nonce is
The cause of the problem is often down to a WordPress plugin or theme failing to use Nonce correctly. It's a security key that is attached to a particular URL when accessing an admin area.
How to Fix the “Are you Sure you Want to Do This” WordPress Issue
Solving this error is relatively simple and usually involves performing the same diagnosis of your themes and plugins.
Refer back to the solution detailed in fixing the WordPress white screen of death error. Solving this error involves renaming the plugins and themes folder from the back-end. When you've renamed them, you will be able to access your wp-admin folder.
When you've accessed your site, all you have to do is activate your theme and plugin one by one to see where the error came from. When you've found the culprit, revert to your original settings.
Conclusion:
In this post, we discussed ten of the most common WordPress errors that exist. To reiterate, you need to back up your WordPress site before making these changes. It helps you revert your site to its original settings. It's a best practice that you don't want to ignore
We hope you enjoyed reading this article!